

 Español
 Català
 Deutsch
 Français
 Português
 Italiano
 Nederlands
 Polski
When the Retry button is visible
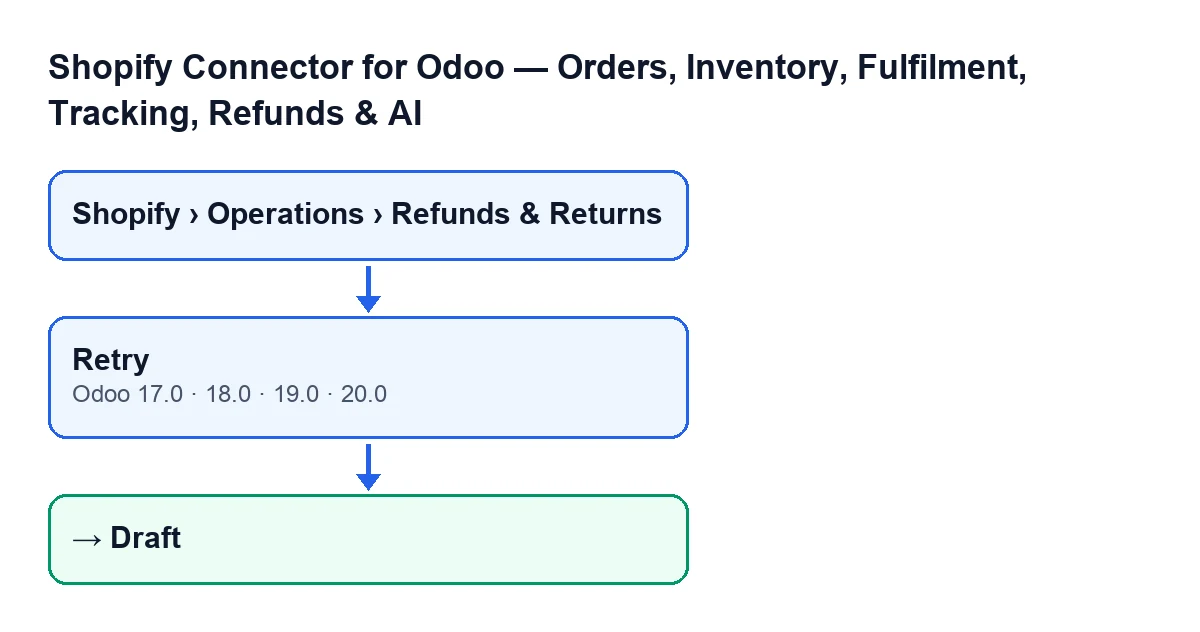
The Retry button sits on the Shopify Refunds screen of Shopify Connector for Odoo. It exists in all four published branches of the module: Odoo 17, 18, 19 and 20. The condition is the same in all four: the button is hidden whenever the State of the refund is not Failed. Put the other way round, you only see it when the refund is Failed.
The State field shows on the refund form and also in the Shopify Refunds list. Its values are Draft, Credit Note Created, Ignored and Failed. The field's default value is Draft, so with that value the button is not visible.
| Refund state | Is Retry visible? |
|---|---|
Draft | No |
Credit Note Created | No |
Ignored | No |
Failed | Yes |
If you look for the button and it is not there, check the State first: with any value other than Failed it does not appear.
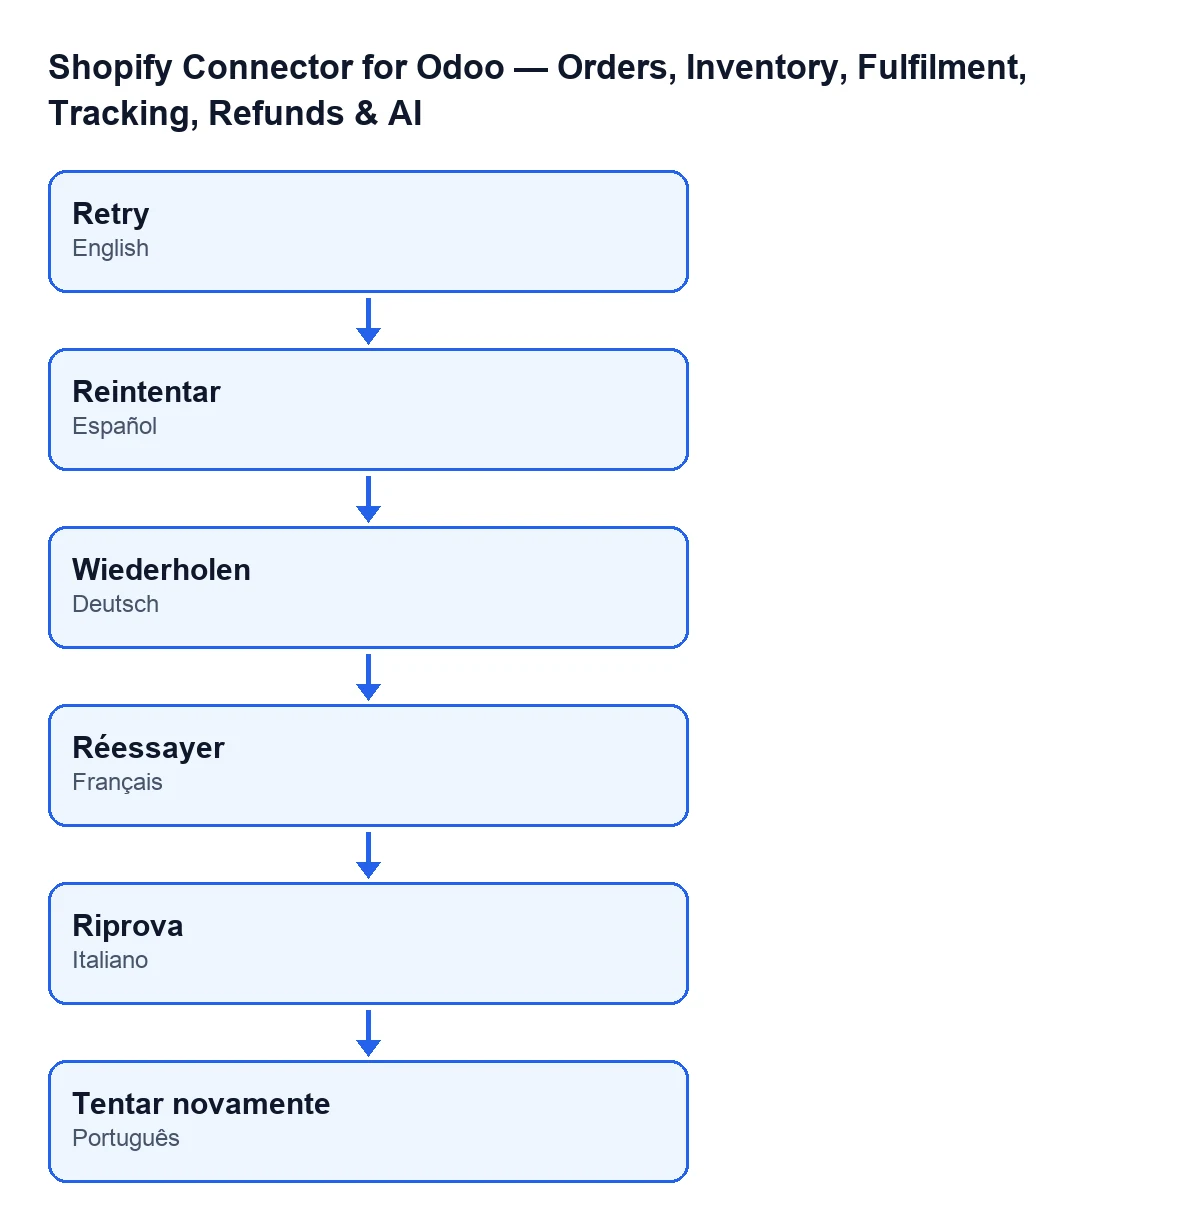
The button's label changes with the language of your Odoo. In English it is Retry; in Spanish, Reintentar; in German, Wiederholen; in French, Réessayer; in Italian, Riprova; and in Portuguese, Tentar novamente.

How to retry a failed refund, step by step
- Open the menu
Shopify › Operations › Refunds & Returns. If you cannot see theShopifyor theOperationspart of the menu, you are missing theViewerpermission: each of those two levels asks for it. - Find the refund whose
StateisFailed. You can see it in the list and also when you open the form. - Open the refund and look for the
Retrybutton. If the state is anything else, it will not be there. - Press
Retry. - Look at the
Stateagain: it should now beDraft. If the button is still visible, the refund is stillFailed.
What the code does when you press it
The code published for Odoo 20 is short, so it can be described in full. The code itself describes it as resetting failed refunds back to draft so they can be retried. When you press the button, this happens, in this order:
- Out of the refunds it acts on, it keeps only those in
Failed. Any that are not are left as they are. - For those it keeps, it writes the
Draftstate and clears the refund's error message. Both changes are saved together. - It stops there: the button's code does nothing else.
It is worth being clear about this: the button does not create the credit note itself, nor move the refund to any other state. It only takes the refund out of Failed, leaves it in Draft and wipes the previous error. What happens next to a refund in Draft is not part of this button.
What to check after pressing it
- The state. It should be
Draft, both on the form and in theShopify Refundslist. - The button. With the refund now in
Draft,Retryis no longer visible. That is what its condition leads you to expect. - The error message. It is cleared when you press the button. If you want to keep the reason for the failure, note it down before retrying.
What you need to use it
The module is published on Odoo Apps for Odoo 17, 18, 19 and 20. It is a one-off payment per version and needs the FlexigoTech Cloud subscription, Connector plan: €49 a month or €490 a year, excluding VAT, with up to 3 accounts on the platform (the Pro plan allows 10). The connection goes through FlexigoTech Cloud, which stores the credentials encrypted, watches the synchronisation and emails you if it fails. You will find the module on the Odoo Apps page and on the module page.
If you need help with your implementation
FlexigoTech implements Odoo 17, 18, 19 and 20 and builds custom connectors and integrations. If your Shopify refunds need their own handling in Odoo, tell us about it and we will look into it.
Keep reading
Checked in the connector's source code (version 20.0) and the linked sources
Sources
- Module source code: flexigobe_shopify_seller_connector 20.0 (d7e627b4): views/shopify_refund_views.xml
- Module source code: flexigobe_shopify_seller_connector 20.0 (d7e627b4): models/shopify_refund.py
- apps.odoo.com/apps/modules/20.0/flexigobe_shopify_seller_connector
- flexigotech.com/precios.html
- flexigotech.com/en/services.html