

 Español
 Català
 Deutsch
 Français
 Português
 Italiano
 Nederlands
 Polski
Before installing: version and what to have ready
Deduce is published on Odoo Apps for 17.0, 18.0 and 19.0. The listing for each of those versions shows €39 excluding VAT, as a one-off payment per version. You will find the details on the Odoo Apps listing and on the module page.
- Check your database is on Odoo 17, 18 or 19 and buy the matching version: payment is per version.
- Decide which AI engine you will use. You pick it in the
AI enginefield (deduce_llm_provider).
- Have the credential you are going to paste to hand. The module has the fields
Deduce license,Groq API key,Gemini API key,OpenAI API keyandNative AI endpoint.
- Check the company has a purchase journal. If the module cannot find one, it shows
There is no purchase journal for %s.
- Check an expense account is configured. If not, you get
No expense account configured.
- If you will record expenses with Deduce, make sure the employee to assign them to exists. The message you will see otherwise is
There is no employee to assign the expense to.
During configuration: the fields you need to fill in
Deduce's configuration comes down to a handful of fields. Here they are, with the technical name in brackets so you can find them if you work with a consultant:
AI engine(deduce_llm_provider): a selector for the AI engine.
Native AI endpoint(deduce_native_endpoint): the address of the native engine.
Deduce license(deduce_license_key): the Deduce licence.
Groq API key,Gemini API keyandOpenAI API key(deduce_groq_api_key,deduce_gemini_api_key,deduce_openai_api_key): the key for each provider.
deduce_llm_model, a text field shown with the labelForm.
Read the photo on upload(deduce_auto_extract_on_upload): according to its help text, when you attach a photo or PDF, the AI reads it automatically.
Auto-validate if confidence ≥(deduce_auto_validate_threshold): its help text says0means always review, and gives0.9as an example for approving only clean, high-confidence captures.
- Choose the engine in
AI engine.
- Paste the key into the field for the provider you have chosen, and check you have not put it in another one.
- Check the value of
Form(deduce_llm_model) before saving.
- Decide whether to switch on
Read the photo on upload.
- Leave
Auto-validate if confidence ≥at0while you test.
With the threshold at 0, every capture waits for review. That is how you see what the AI reads before anything validates on its own; you can raise it once you have reviewed a few.
First captures: the states you will see
Every capture has a state field with these values:
New
Queued
Extracting
Needs review
Validated
Posted
Rejected
Duplicate
Error
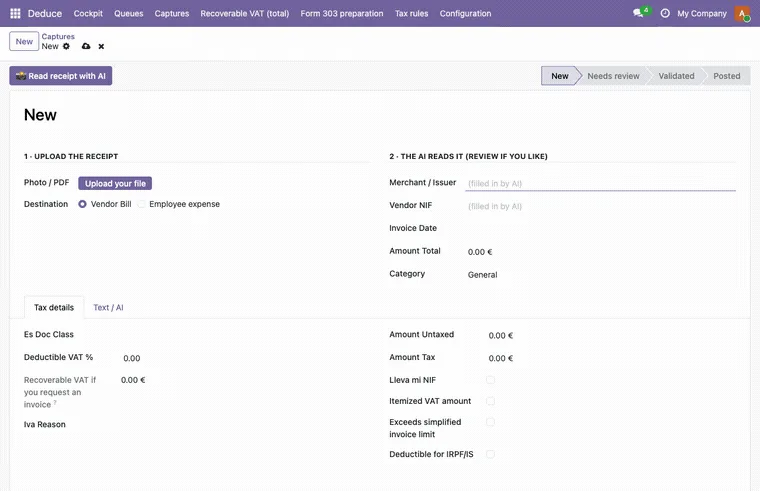
A freshly created capture shows as New, with an empty form.
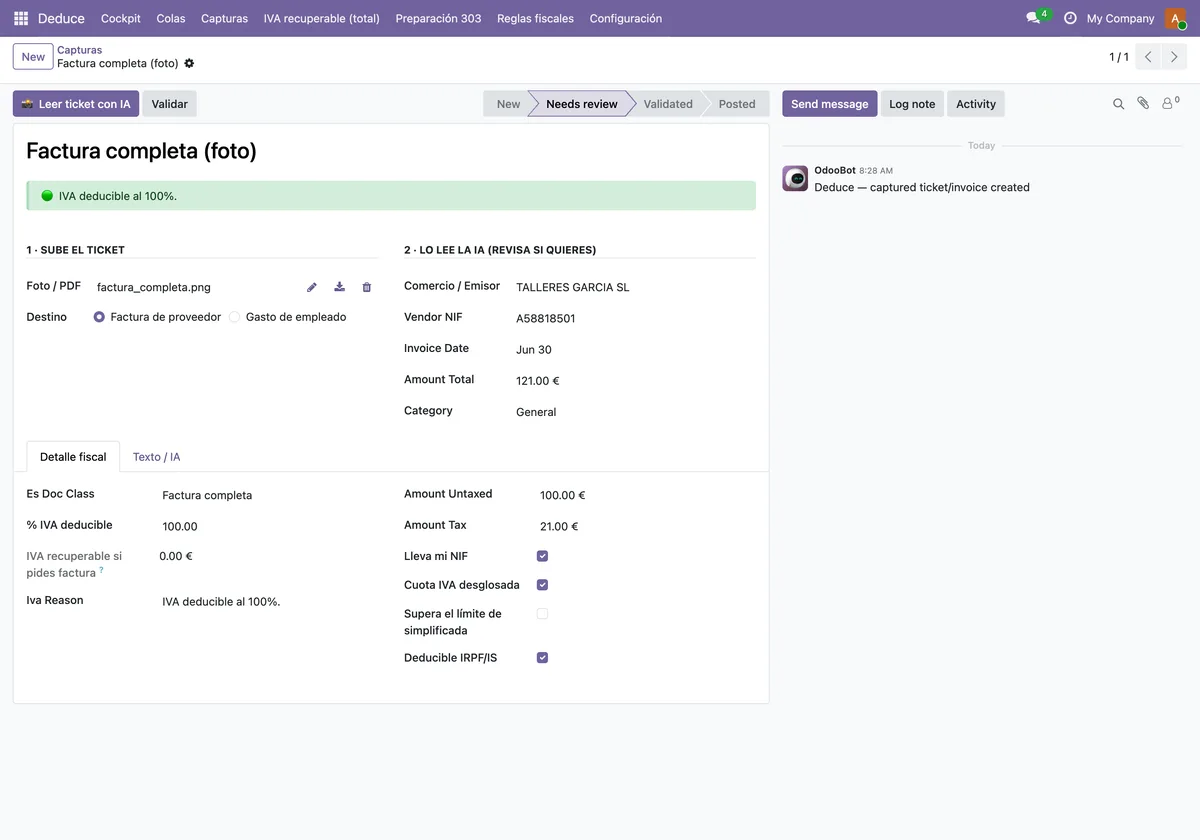
Once the AI has read the document, the capture sits in Needs review with the extracted data for you to check.
Two of the module's messages set the final order. Only a capture under review can be validated: otherwise you get Only a capture awaiting review can be validated (current state: %s). And only a validated capture can be posted: otherwise you get Solo se puede contabilizar una captura validada (estado actual: %s).
- Create a capture in
Captures › Newand upload the file withUpload your file.
- Check the destination shown on the form (for example,
Vendor Bill).
- When it reaches
Needs review, go over the merchant details and the tax detail tab.
- Validate. If the state error appears, look at the state the capture is in: the message tells you.
- Post only captures in
Validated.
- If you see
Ya existe un documento contabilizado para esta captura (posible duplicado)., do not repeat the operation: check the document that already exists.
Your first week: what to keep an eye on
The Cockpit asesoría view groups, per company, the indicators worth watching while you get started.
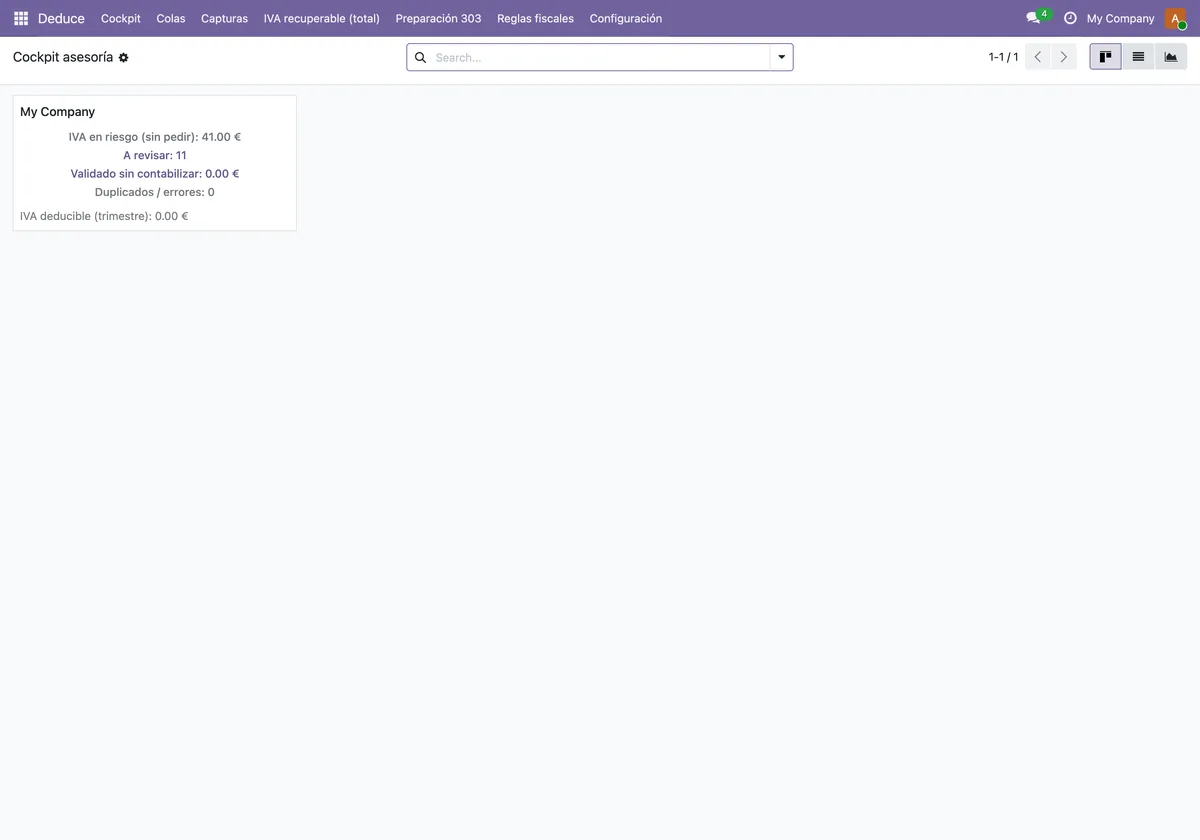
- Check the to-review indicator every day: with the threshold at
0, everything goes through there.
- Look at the validated but not posted amount and post what is pending.
- Check the duplicates counter and any captures in
Duplicate.
- Go over VAT at risk and quarterly deductible VAT for each company.
- Look for captures in
ErrorandRejectedand decide what to do with each one.
- If you hit a configuration error (journal, expense account, employee), fix it and try again.
- At the end of the week, decide whether to raise
Auto-validate if confidence ≥or keep it at0.
If you want to understand which menus the module adds and what a capture goes through under the bonnet, we cover it in how Deduce works inside.
If you want help getting started
At FlexigoTech we implement Odoo and build bespoke connectors and integrations. If you need Deduce to fit your chart of accounts, your journals or your expenses workflow, get in touch through the module page.
Keep reading
Checked in the module's source code (version 19.0) and the linked sources
Sources
- Module source code: deduce_base 19.0 (2ef1ed0e): models/deduce_capture.py
- Module source code: deduce_base 19.0 (2ef1ed0e): models/res_config_settings.py
- apps.odoo.com/apps/modules/19.0/deduce_base
- apps.odoo.com/apps/modules/17.0/deduce_base
- apps.odoo.com/apps/modules/18.0/deduce_base
- flexigotech.com/en/services.html