

 Español
 Català
 Deutsch
 Français
 Português
 Italiano
 Nederlands
 Polski
Before you open the account form
The module is published on Odoo Apps for Odoo 17, 18, 19 and 20. On the listing for each of those versions it costs €149, a one-off payment per version, excluding VAT. Before touching anything in Odoo, gather what you will need from the e-Signature.eu side.
- Confirm which Odoo version you run and that the module you install is the one for that version.
- Make sure you can log in to your e-Signature.eu account: that is where the x-api-key lives, under
Settings → Signatures API, along with the User ID.
- Decide which company the signing account will belong to in Odoo, as the form has a company field (
company_id).
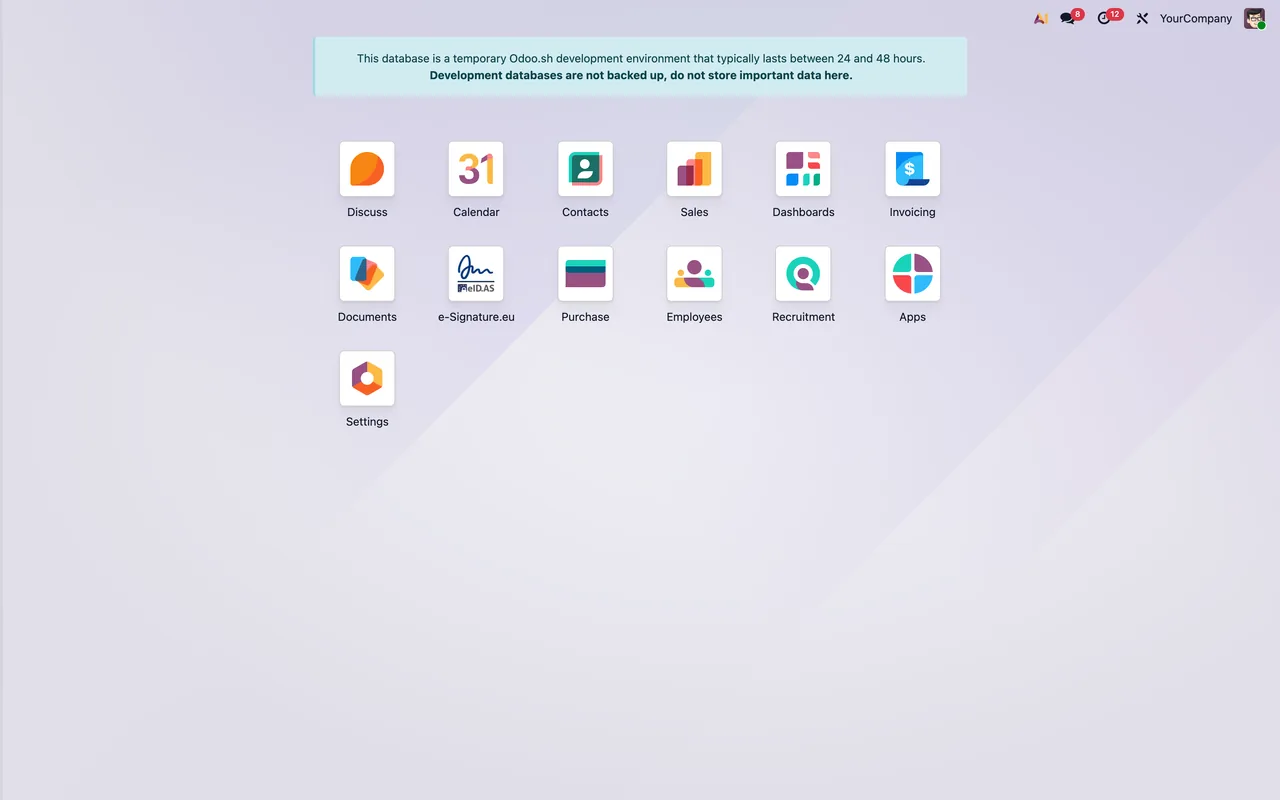
- After installing, find the e-Signature.eu app on the Odoo home screen.
First: account credentials and connection
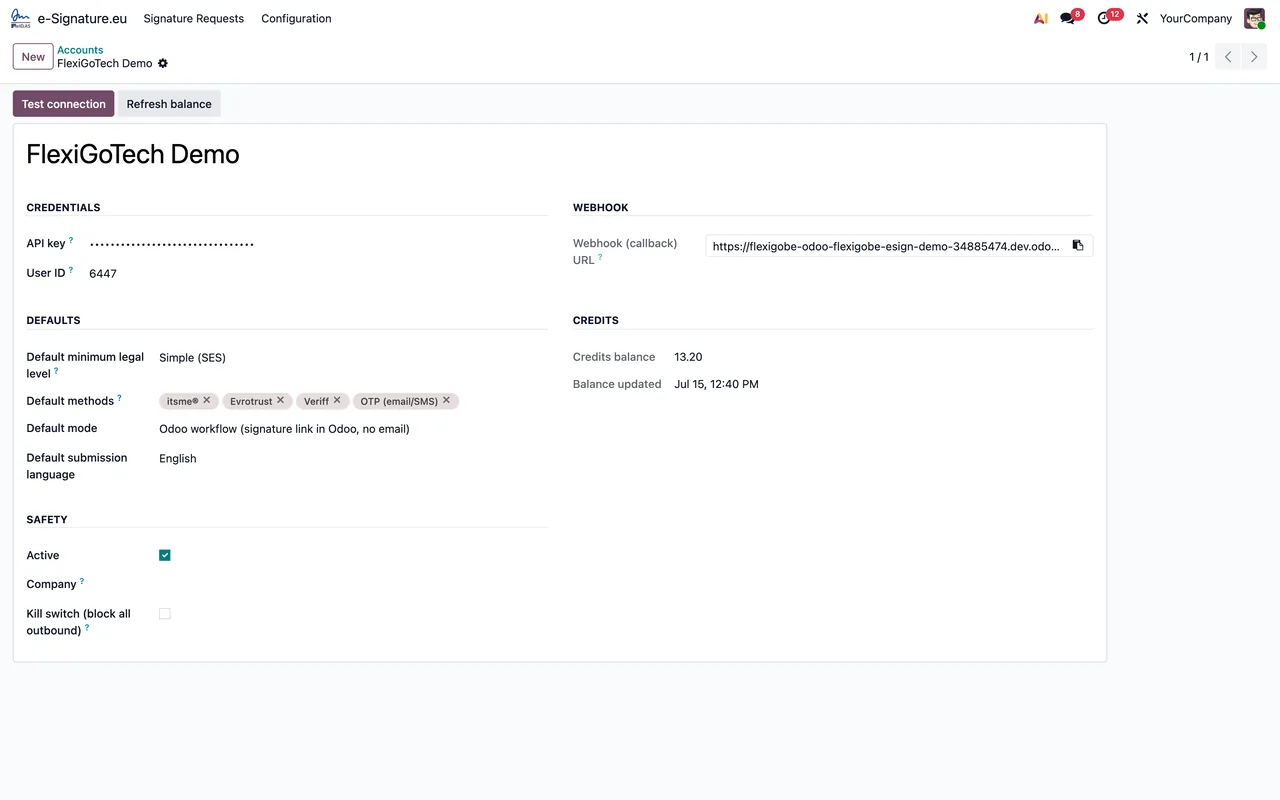
Everything starts on the account form. These are the fields that link Odoo with your e-Signature.eu account.
API key: paste the x-api-key from your e-Signature.eu account, found underSettings → Signatures API.
User ID: copy the User ID from your e-Signature.eu account. The module sends it as theuseridURL parameter.
Base URL: this is the e-Signature.eu API endpoint, and the field itself marks it as fixed.
Webhook (callback) URL: copy the URL shown on the form and paste it into your e-Signature.eu account, underSettings → Signatures API.
company_id: set the company this account belongs to. If you plan to leave it empty, first read the field's full help text in your database, which covers that case.
Kill switch (block all outbound): check it is unticked before testing. It is an emergency stop that blocks every outbound API call from this account.
Next: the defaults for each request
The same account stores what is proposed when you create a new request.
Default minimum legal level: choose the minimum eIDAS level pre-selected on each new signature request.
Default methods: tick the signing methods offered by default when sending a document.
Default mode: check which mode is set by default. Bear in mind that a request's automatic reminder only applies in Email mode.
Default automatic reminder (days): enter the number of days you want; 0 means no automatic reminder.
Default submission language: set the default submission language.
Auto-send on confirmation: the field's help mentions confirming a sales order and posting a customer invoice, then goes on to list more cases. Read the full text in your database and decide whether to switch it on now or after your first tests.
Your first test request
With the account ready, create a request using a test document and a signer you control.
Title of request: write a clear title, as this is what signers see on e-Signature.eu.
- Account (
account_id): check the request points to the account you have just configured.
Signing methods: review the methods signers may choose from for this request.
Minimum legal level: this field filters the methods offered to those reaching at least that eIDAS level.
Signers: add the signers on their tab.
Document to sign: attach the document to be signed.
Signature placement: review where the signature goes.
Note to the signatories: if you write a note, it is included in the invitation email sent to signatories.
Automatic reminder (days): 0 means none, and it only applies in Email mode.
Email me on each signature: tick it if you want an email notification from e-Signature.eu each time someone signs.
Submission language: confirm the submission language for this request.
What to check in the first week
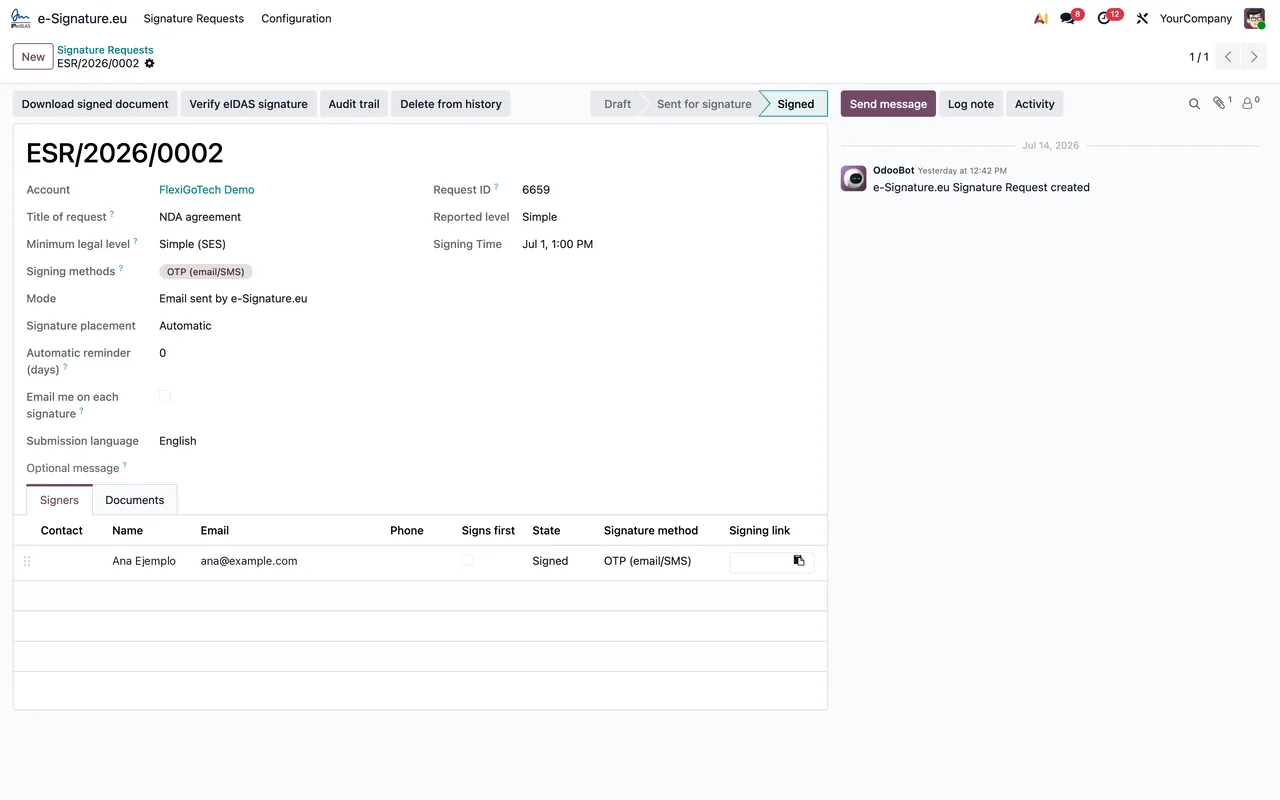
During the first few days, open each request you have sent and go through these fields. If something looks wrong, the connector's error messages and warnings gives you the literal texts and what to do about each one.
Request ID: this is the request's id on e-Signature.eu (id_sign). Compare it with what you see in your e-Signature.eu account.
Source document: click it to open the document the request was created from. Next to it areSource modelandSource record.
Signed document: check the signed document is attached on requests that have been signed.
Audit trail: check the audit trail attachment as well.
Reported levelandQES verified: look at the reported level and the state of that tick box on each request.
Credits balanceandBalance updated: on the account, review the credits balance and when it was last updated.
Auto-send on confirmation: if you switched it on, confirm a test order or invoice and see which requests appear.
Kill switch (block all outbound): know where it is in case you need to stop every outbound call from the account.
How to read a signed request
The screenshot above shows a demo request in signed state: the account, title, SES level and OTP method; on the Signers tab, the signer; and in the chatter, an OdooBot message. If you want to see which menus the module adds and what a record goes through behind the scenes, read how the connector works inside Odoo.
If you would like help getting it live
At FlexigoTech we implement Odoo 17, 18, 19 and 20 and build bespoke connectors and integrations. If you need signing to fit around your orders, invoices or other documents in your database, get in touch. You will find more about the module on its page at flexigotech.com and on the Odoo Apps listing.
Keep reading
Checked in the module's source code (version 20.0) and the linked sources
Sources
- Module source code: flexigobe_esignature_eidas_itsme_evrotrust_veriff_connector 20.0 (4958ee1e): models/esignature_account.py
- Module source code: flexigobe_esignature_eidas_itsme_evrotrust_veriff_connector 20.0 (4958ee1e): models/esignature_request.py
- apps.odoo.com/apps/modules/20.0/flexigobe_esignature_eidas_itsme_evrotrust_veriff_connecto
- apps.odoo.com/apps/modules/17.0/flexigobe_esignature_eidas_itsme_evrotrust_veriff_connecto
- apps.odoo.com/apps/modules/18.0/flexigobe_esignature_eidas_itsme_evrotrust_veriff_connecto
- apps.odoo.com/apps/modules/19.0/flexigobe_esignature_eidas_itsme_evrotrust_veriff_connecto
- flexigotech.com/en/services.html