

 Español
 Català
 Deutsch
 Français
 Português
 Italiano
 Nederlands
 Polski
Where the button is and what the menu asks for
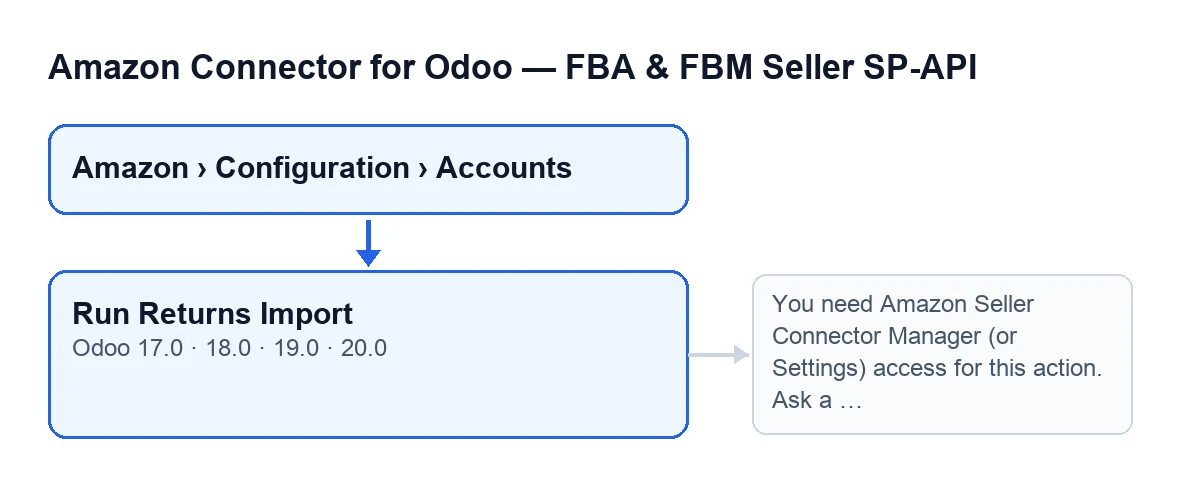
The Run Returns Import button is on the Accounts screen, reached through Amazon › Configuration › Accounts. In that menu, the Amazon level asks for Viewer access, and the Configuration and Accounts levels ask for Manager; if you lack the permission for a level, you do not see that level. What follows describes the code published for Odoo 20.
Five wrong ideas about the button
Myth: «The button is the normal way to bring in returns»
Reality: Odoo already does it on its own, and the button is the exception for running it by hand. On the account form, in the Returns & Reviews tab, Returns Import group, there is the Enable returns sync checkbox, ticked by default. With it ticked, two scheduled tasks, active as soon as the module is installed, call the same import without you pressing anything:
Amazon SP-API - Sync returns, every three hours.Amazon SP-API - Auto receive returns to stock, every fifteen minutes.
The difference from the button: the tasks give CRON as the source and run with a setting that avoids posting messages on the account; the button gives Manual as the source and carries no such setting. Also, the two tasks only start this import for accounts that have that checkbox ticked; the button's own code does not look at it.
Myth: «If you can see the button, you can press it»
Reality: the button is visible on the Accounts screen in Odoo 17, 18, 19 and 20, but the first thing the action does is check your permissions. If you do not have Manager access to the connector (or Settings access), it stops with this message:
You need Amazon Seller Connector Manager (or Settings) access for this action. Ask a manager to grant Manager access.
Fix: ask whoever manages permissions to give you Manager access. There is a second check: after the group check, the code verifies that you can write to the account. The scheduled tasks call the import directly, without going through this check.
Myth: «Press it and the returns appear at once»
Reality: the import depends on Amazon preparing a report, and the action waits inside the click itself. In order:
- It checks your permissions, as above.
- It asks Amazon to create the returns report.
- It asks for the report status again and again, with a pause between attempts. It stops asking when Amazon marks the report as finished, cancelled or failed, or when the attempts run out.
- If it is finished, it downloads the report document and imports it, up to a maximum number of lines per run.
- It builds a summary with the report rows, the processed ones, and those created, updated, skipped and with an error.
The summary also states the account and the source. It is the first thing to read after pressing.
Myth: «If Amazon does not deliver the report, the button breaks»
Reality: when the report ends up cancelled or failed, or does not arrive in time, the import does not carry on: it records the result, posts it as a message on the account (the scheduled tasks skip that) and finishes without importing anything. The button stays visible on the screen, so you can press it again a little later.
Myth: «Importing returns is the same as receiving them into stock and refunding them»
Reality: these are separate options, most of them in the Returns & Reviews tab of the account form:
Returns: auto-receive to stock, in theReturn Stock Automation (ON by default)group. It is ticked by default. Its help says: «Automatically creates and validates return pickings in Odoo for finalized Amazon returns.» If it is ticked, after importing, the action starts that receiving step with the lines from that run and adds to the summary how many it evaluated, how many it completed, how many it skipped and how many failed.Auto-create credit notes (opt-in). It is unticked by default. Its help says: «Automatically creates a draft customer credit note when the return refund amount is reported and the sale is accounted in Odoo.»Sync return attributes (opt-in). It is unticked by default. Its help says: «Reads Amazon return attributes by SKU for prepaid-label and returnless-refund policies.»
Another option, External returns API (opt-in), sits in the Orders & Fulfillment tab, External Shipment Sync (ON by default) group, and is unticked by default. Its help says: «Enriches return lines from Amazon External Fulfillment Returns API when an External Return ID is available.» The three-hourly task also goes through accounts that have the attributes sync or this external API ticked, and runs those syncs in addition to the import where they apply.
Versions and the label in each language
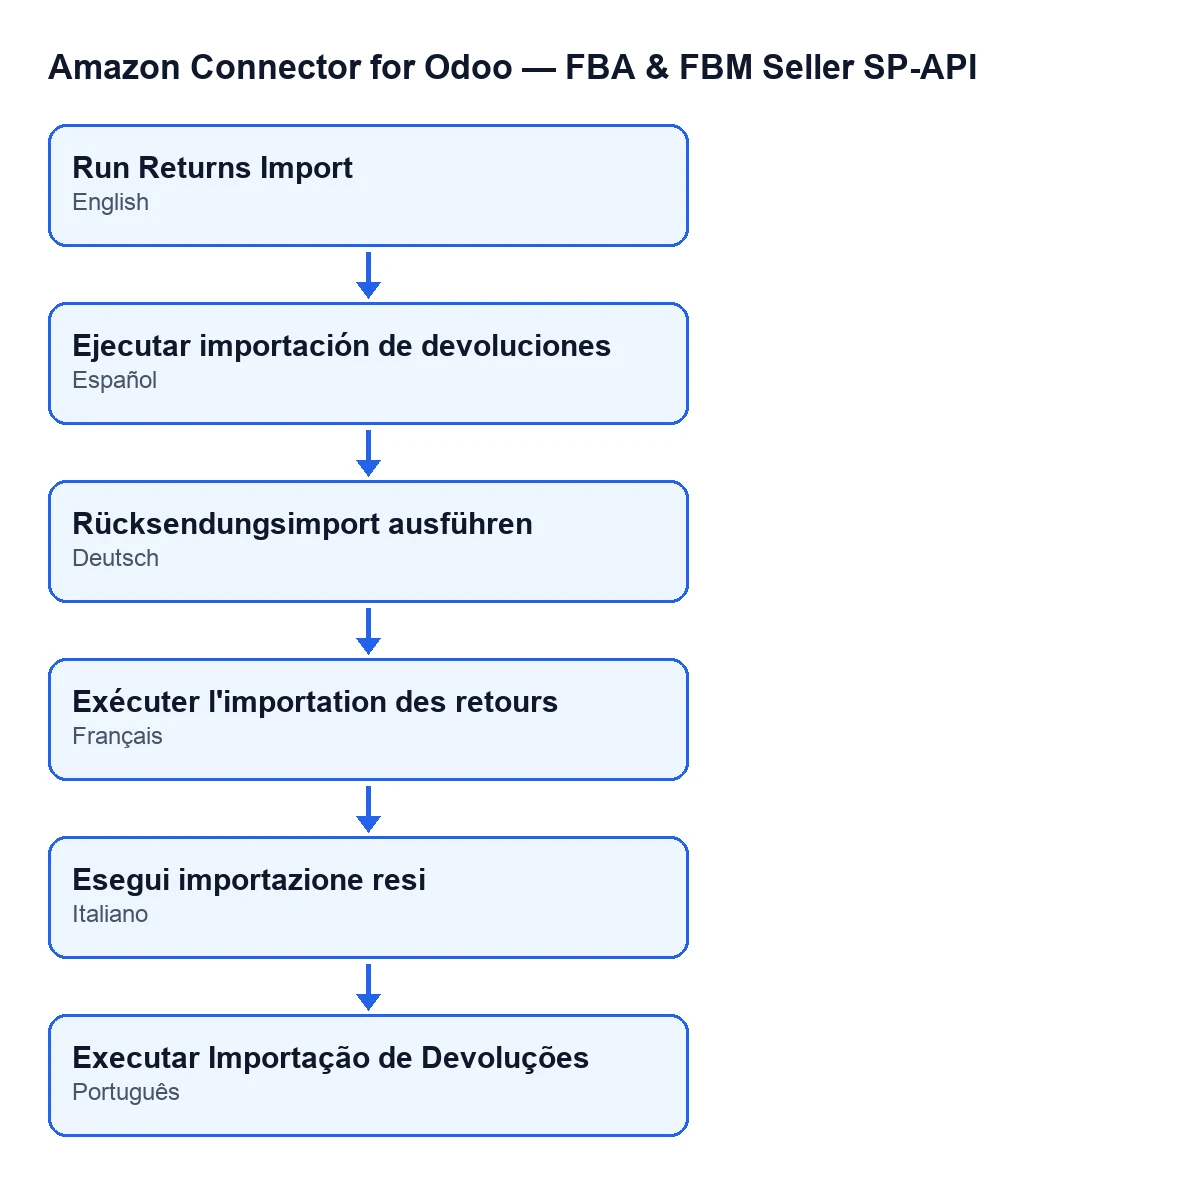
The button is on the Accounts screen in every published branch of the module: Odoo 17, 18, 19 and 20. Its label changes with the language of your Odoo, and the published translations cover Spanish, German, French, Italian and Portuguese; the diagram below shows the label in each.
What it costs and how we help
The module is a one-off payment per Odoo version and needs a FlexigoTech Cloud subscription, Connector plan: €49 a month or €490 a year, excluding VAT, with up to three accounts on the platform. The connection goes through FlexigoTech Cloud, which stores the credentials encrypted, watches the synchronisation and emails you if it fails. Without a subscription, or with the service suspended, whatever the subscription provides stops; your data stays in your Odoo. See the Odoo Apps listing and the module page.
If you are implementing Odoo, FlexigoTech implements Odoo 17, 18, 19 and 20 and builds custom connectors and integrations.
Keep reading
Checked in the connector's source code (version 20.0) and the linked sources
Sources
- Module source code: flexigobe_amazon_seller_connector 20.0 (8576afa5): views/amazon_spapi_account_views.xml
- Module source code: flexigobe_amazon_seller_connector 20.0 (8576afa5): models/amazon_spapi_account.py
- apps.odoo.com/apps/modules/20.0/flexigobe_amazon_seller_connector
- flexigotech.com/en/services.html
- flexigotech.com/precios.html