

 Español
 Català
 Deutsch
 Français
 Português
 Italiano
 Nederlands
 Polski
The problem: until you are verified, GoCardless lets you neither collect nor receive the money
According to GoCardless's documentation, an account has to be verified before it can start collecting payments and receiving its payouts; the module repeats it in the help of its verification field: GoCardless pays out only to verified accounts. That is why the connector does not stop at checking that the credentials work: when you test the connection it also stores the verification status that GoCardless returns.
It helps to be clear about the boundary: the button does not verify any bank account. It reads the creditor of your GoCardless account, records the verification status GoCardless gives it and reports on the SEPA scheme. The verification itself is done with GoCardless, and Odoo shows you where it stands, as explained below.
If you do not use Odoo yet, the idea is this: the link to GoCardless lives on the form of a payment provider, and from that same form you ask GoCardless who the account's creditor is and whether it can collect SEPA Direct Debit.

Where the button is and when it shows
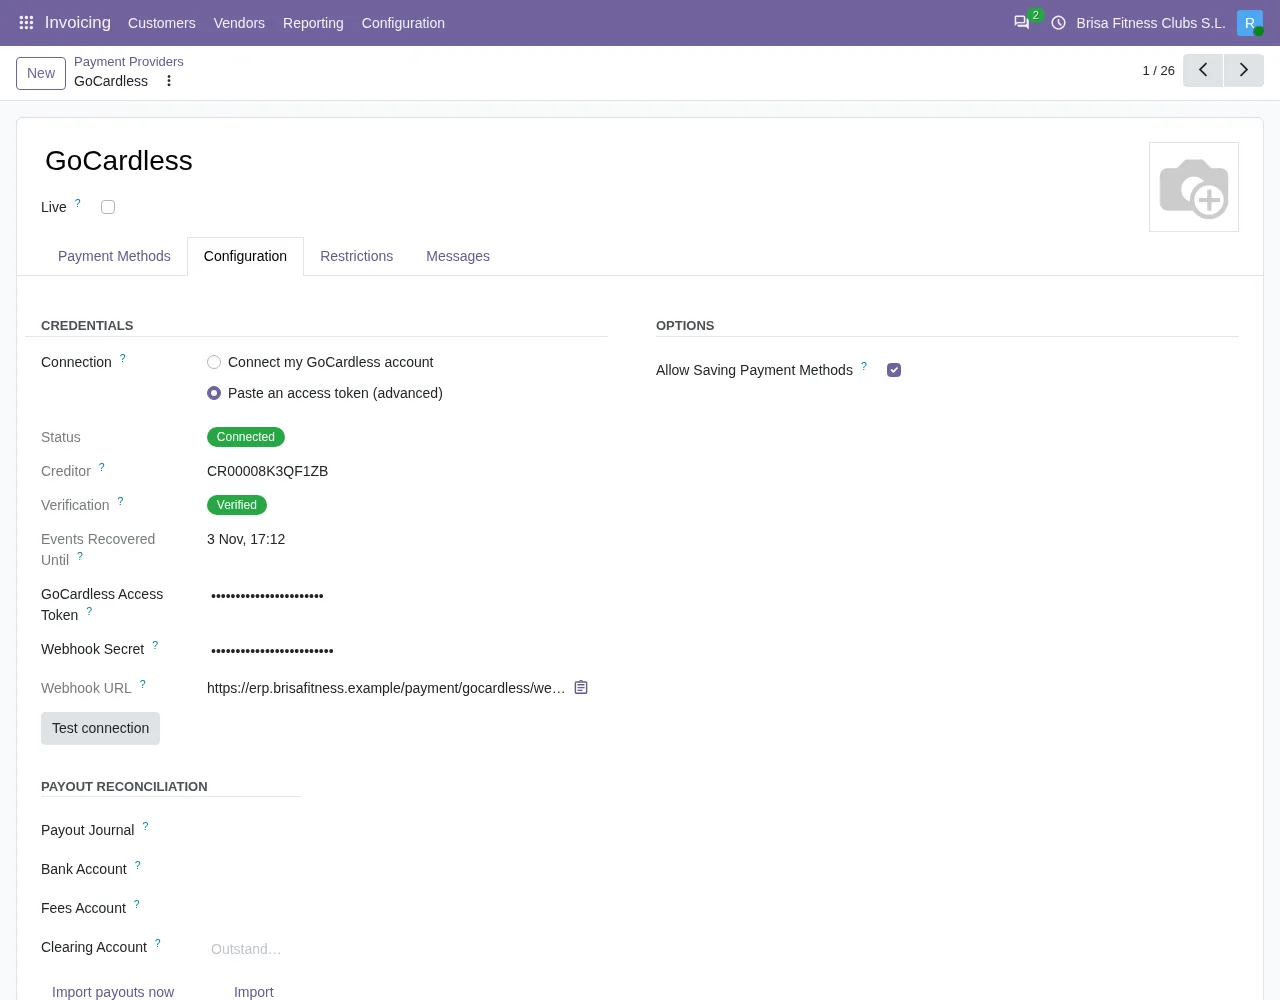
The Test connection button is on the form of the GoCardless payment provider. It is visible only when the provider is the GoCardless one and, in addition, the Status field says the connection is made or the Connection field is in direct mode. With the default values of a provider that is not connected, the button does not appear.
That condition is the same in Odoo 17, 18, 19 and 20. Everything below describes the code of Odoo 20.
What it does when you press it, in order
- It asks GoCardless for the account's creditor. If the call fails, the test stops with the corresponding error message.
- If GoCardless returns none, the test stops with the message
This GoCardless account has no creditor set up yet.and nothing that the test was going to change is saved. - If there is a creditor, it stores its identifier and its verification status on the provider. If GoCardless returns a status the module does not recognise, the status is left empty.
- If the connection is in direct mode, it marks the connection as connected and, if the provider had no date for the last event yet, sets the current date and time.
- It looks at the creditor's schemes and shows the connection message that applies, depending on whether a SEPA scheme exists.
The message appears as a success notification that does not stay fixed on screen.
Some cases the test can give
| Case | What you see | What the module does |
|---|---|---|
| The account has a creditor and a SEPA scheme | Connected to … (…). SEPA Direct Debit is enabled. | Stores the creditor and its verification status. The dots are the creditor's name and country. |
| The creditor has no SEPA scheme | Connected to …, but this creditor has no SEPA scheme enabled yet, so SEPA Direct Debit cannot be collected. | Still stores the creditor and its verification status. The dots are the creditor's name. |
| The account has no creditor | This GoCardless account has no creditor set up yet. | The test stops and nothing is saved. |
| Provider not connected, default values | The button is not shown | The button is not available on the form. |
| Connection in direct mode | The button is shown even if Status does not say the connection is made | Once it finds the creditor, it marks the connection as connected and, if it was missing, sets the date of the last event. |
The connection messages do not mention verification: the verification status is stored on the provider, but the message only reports the creditor and SEPA. So read the message in full: a creditor without a SEPA scheme also shows as connected, but the text says SEPA Direct Debit cannot be collected.
Where you see the verification status
What the test stores shows on the provider's form, in the Verification field, which only appears when it has a value. It can read «Verified», «In review by GoCardless» or «Action required». With «Action required» you also get the «Finish verification» link, which takes you to GoCardless's verification process: the live account's or the sandbox one, depending on the environment. The field is refreshed every time you test the connection.
What the connector does around the test
The test goes through the same entry point as every other call the module makes to GoCardless. Its code gives these behaviours:
- Depending on whether the provider is in production or in test mode, the module calls one GoCardless address or another.
- Every call carries the API version that GoCardless requires.
- If a call is a send with an idempotency key and the connection drops or GoCardless does not answer, the module sends it again with the same key. If GoCardless answers that the resource already existed from an earlier attempt, the module may adopt that resource instead of raising an error.
- If GoCardless rate-limits the calls, the module waits and tries again, a limited number of times.
The connector comes with the FlexigoTech Cloud subscription. Price and plan are on the module page and in the Odoo Apps listing.
If you do not use Odoo yet
If you collect with GoCardless today and want the connection, the account check and the collections inside one business system, FlexigoTech can help with the Odoo implementation: we implement Odoo 17, 18, 19 and 20 and build connectors and custom integrations. In addition, the GoCardless connector is available as a module, and you can start by testing the connection against your sandbox account.
Keep reading
Checked in the connector's source code (version 20.0) and the linked sources
Sources
- Module source code: flexigo_payment_gocardless 20.0 (6fe1a716): models/payment_provider.py
- Module source code: flexigo_payment_gocardless 20.0 (6fe1a716): views/payment_provider_views.xml
- flexigotech.com/en/services.html
- docs.gocardless.com/docs/partner-integrations/getting-your-users-verified